CosmWasm + Remix IDE
This tutorial details how to deploy and run Neutron smart contract on Remix IDE. It is a no-setup tool with a GUI for developing Neutron smart contract.

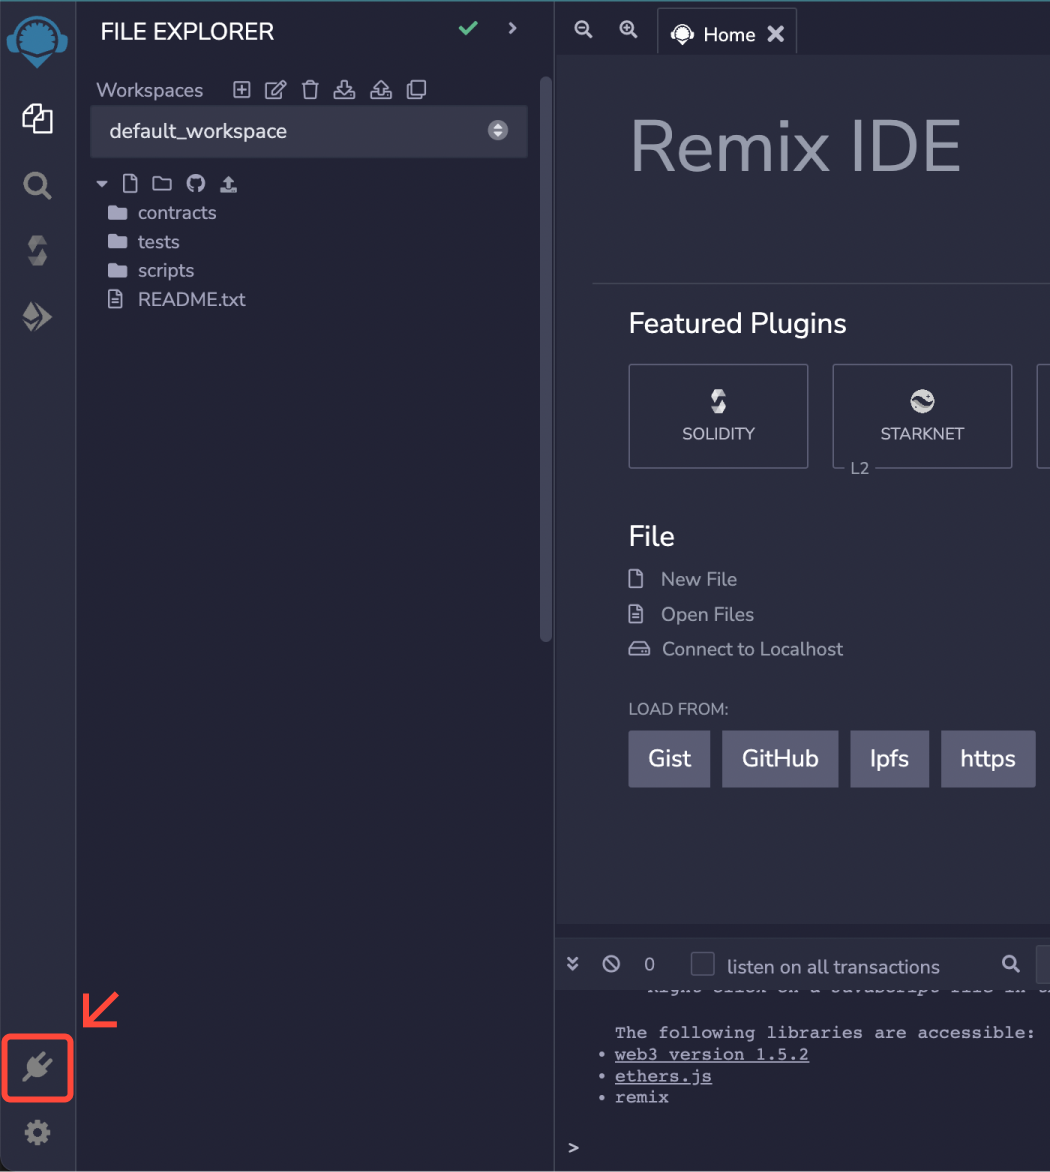
Connect to Remix IDE
WELLDONE Code is the official Remix IDE Plug-in. Please visit the Remix IDE and follow the guide below.
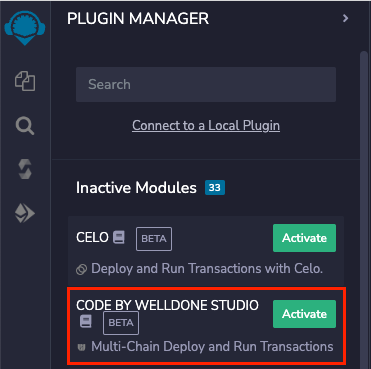
Click Plugin Manager button in the left bar and search for CODE BY WELLDONE STUDIO and click the Activate button.
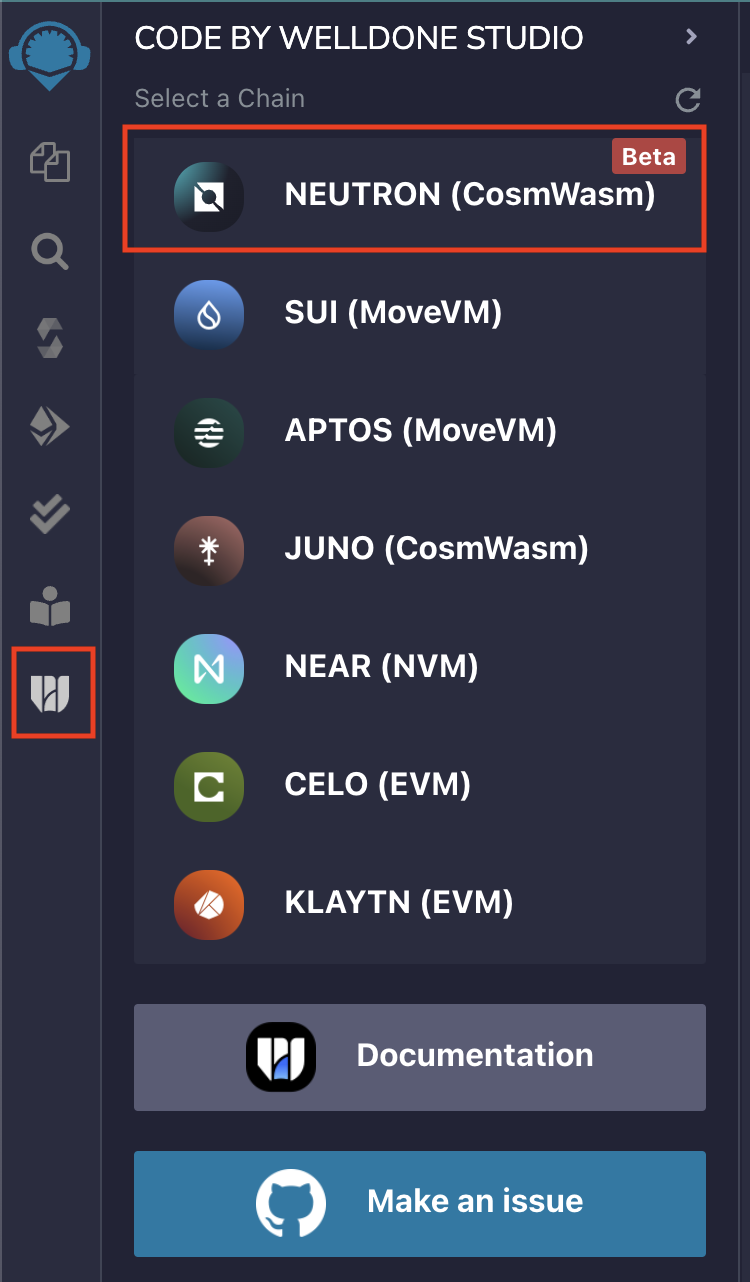
Select a Chain
Click on Neutron(CosmWasm) in the list of chains.
If you click the Documentation button, go to WELLDONE Docs, and if you find a problem or have any questions while using it, click the Make an issue button to go to the Support Channel and feel free to create an issue.
Install a browser extension wallet
Other wallets will be supported soon, and WELLDONE Wallet can be used now.
After choosing a chain, click the Connect to WELLDONE button to connect to the WELLDONE Wallet.
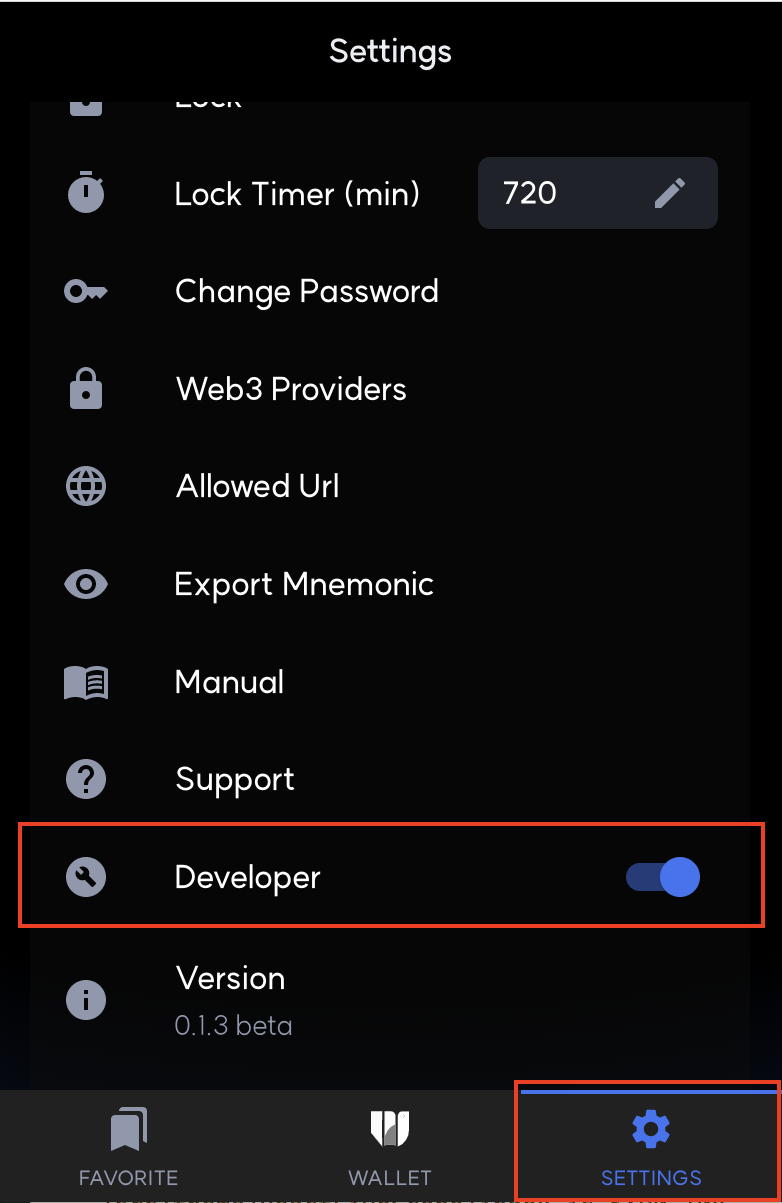
If you haven't installed the WELLDONE Wallet yet, please follow the following manual to install and create a wallet and create an account for Neutron. Finally, go into the Setting tab of your wallet and activate Developer Mode.
And you must click the Refresh button in the upper right corner of the plug-in to apply changes to your wallet.
Create the Project
In Neutron, you can write smart contracts with Rust language. WELLDONE Code provides two features to help developers new to Neutron.
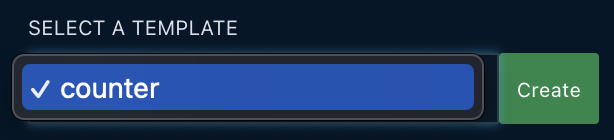
Create Template
Create a simple example contract code written in Rust. You can create a sample contract by selecting the template option and clicking the Create button. More templates may be found at CosmWasm Samples.
New Project
Automatically generate a contract structure. Click the Create button to create a contract structure.
You can create your own contract projects without using the features above. However, for the remix plugin to build and deploy the contract, it must be built within the directory neutron/. If you start a new project, the structure should look like the following.
Writing Contracts in Rust
neutron
└── <YOUR_PROJECT_NAME>
    ├── Cargo.toml
    └── src
        └── contract.rs
    └── examples
        └── schema.rs
Compile the Contract
We now only support the AMD compilation server. The build environment is crucial for contract verification due to the non-deterministic nature of building Rust into Wasm.
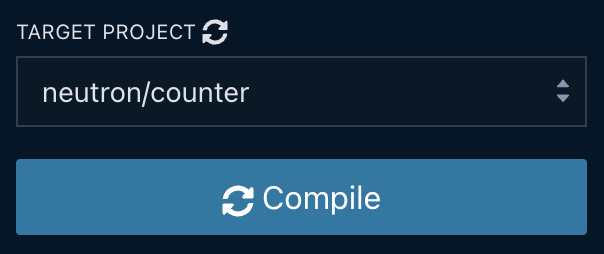
Step 1: Select the project you want to compile in the TARGET PROJECT section.
Step 2: Select a compilation option and click the Compile button.
Step 3: When the compilation is complete, a wasm and schema files are returned.
You can check the returned wasm file and schema files in neutron/<YOUR_PROJECT_NAME>/artifacts and neutron/<YOUR_PROJECT_NAME>/schema.
When you run the recompilation, the existing artifacts and schema folders will be deleted and the compilation process will start anew.
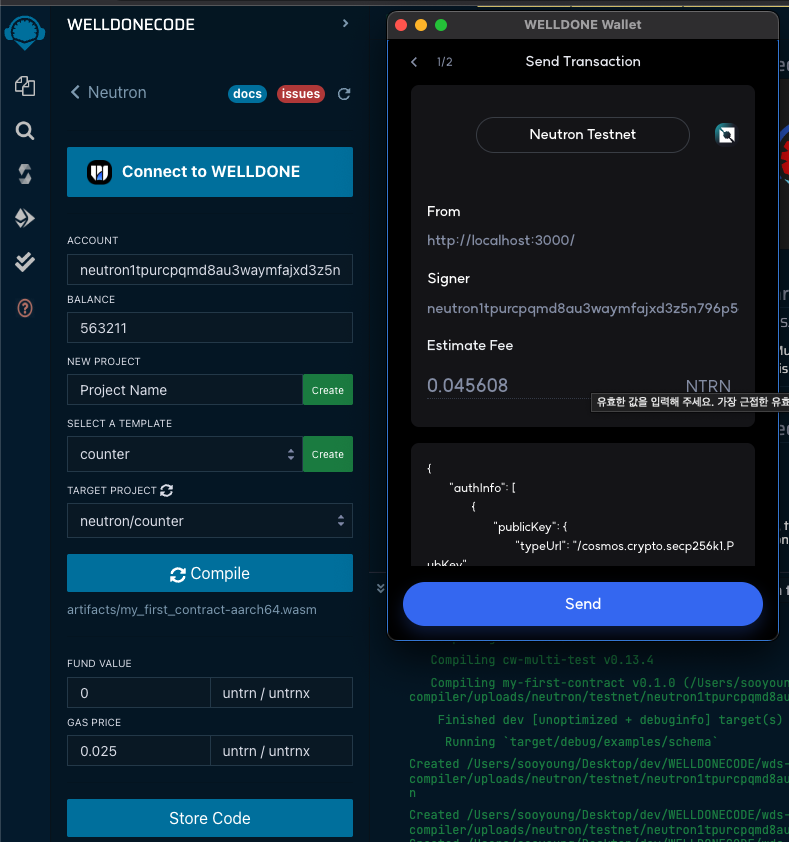
Store Code
The WELLDONE Wallet automatically finds and imports networks associated with your wallet address. As a result, before deploying, you should choose whether you want to send a transaction to mainnet or testnet.
Step 1: If you have a compiled contract code, then Store Code button will be activated.
Step 2: Gas price is set to 0.025 untrn/untrnx as a default and can be modified.
Step 3: Click the Store Code button.
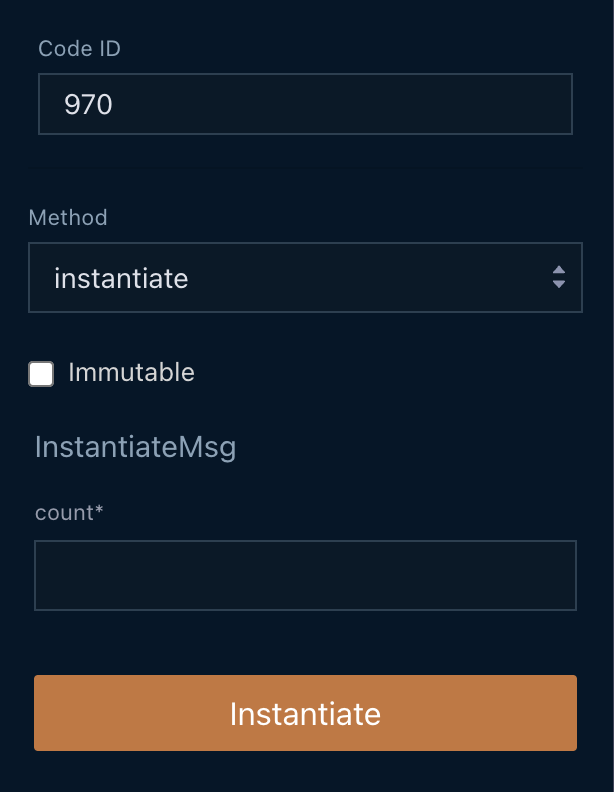
Instantiate the Contract
You have the option to Instantiate or Migrate. In the current version, if you want to run either of them again, you need to start over from the compilation process. This will be updated in the future for greater convenience.
Step 1: When the Store Code is completed, a Code ID is generated.
Step 2: You can choose whether to allow contract upgrades or make them unmodifiable through the immutable option.
Step 3: If there are arguments for contract instantiation, input the parameters and click the Instantiate button. The arguments are generated through react-jsonschema-form.
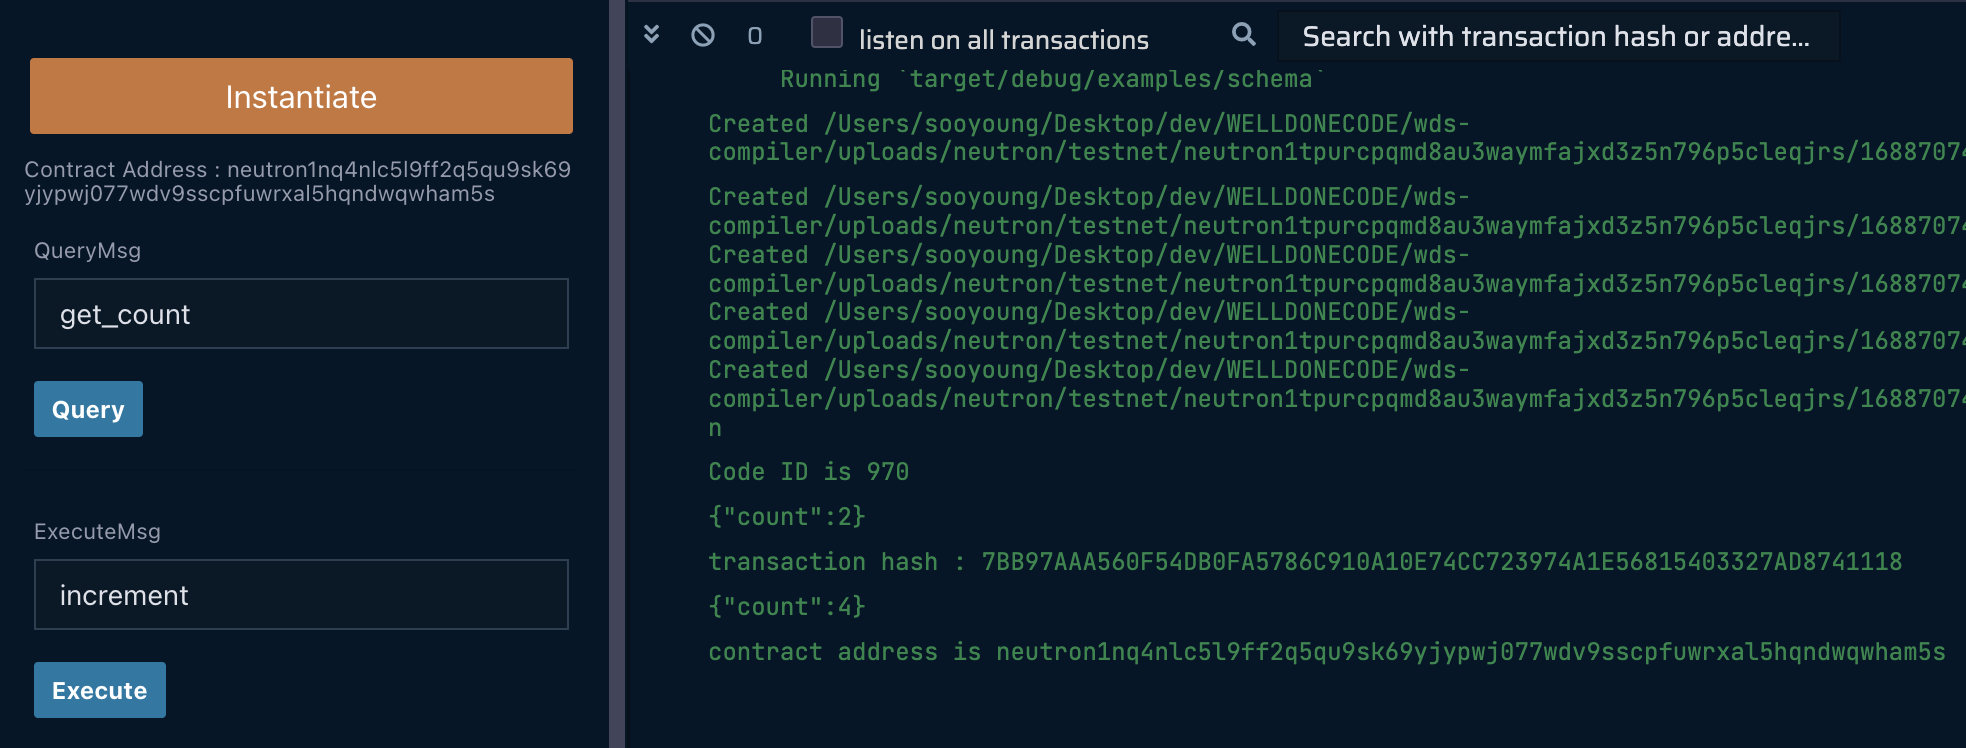
Execute the Contract
Step 1: Select the method to run.
Step 2: Add parameters as you needed.
Step 4: Run the method via clicking Query or Execute button. If you are sending a transaction, you must sign the transaction by clicking the Send button in the WELLDONE Wallet.
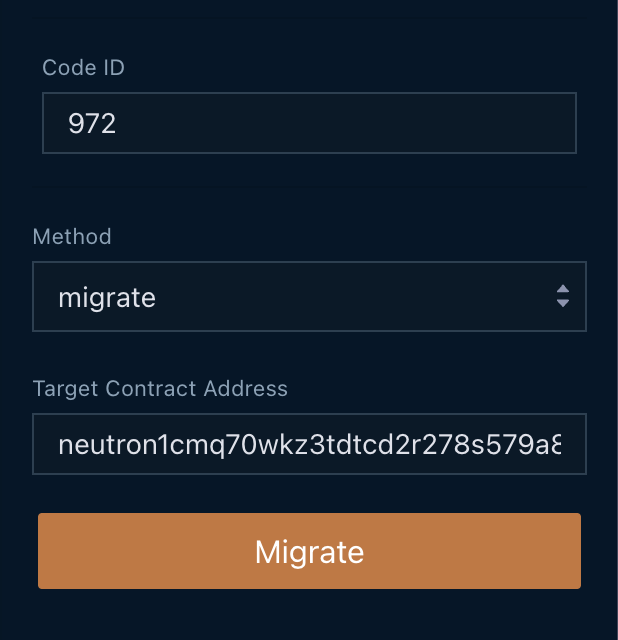
Migrate the Contract
You have the option to Instantiate or Migrate. In the current version, if you want to run either of them again, you need to start over from the compilation process. This will be updated in the future for greater convenience.
Step 1: When the Store Code is completed, a Code ID is generated.
Step 2: Select the method as migrate.
Step 3: Enter the target contract address for the migration and click the Migrate button.